A Step-by-Step Guide to build a Wi-Fi Pentest Lab
A Step-by-Step Guide to build a Wi-Fi Penetration Testing Lab
Everybody nowadays uses Wi-Fi either at home or in offices. More than 50% of all cyber-attacks are committed against small and medium-sized businesses and Wi-Fi is no exception for attackers. It is important to learn to secure Wi-Fi networks with strong authentication methods and settings and continuous monitoring for any malicious events.
This guide walks you through creating a controlled lab from scratch for your Wi-Fi penetration testing journey without breaking the law.
Before you learn to set up a Wi-Fi penetration testing environment, let us briefly understand the authentication methods employed by Wi-Fi networks. Then I will teach you setting up environment for penetration testing.
Wi-fi authentication methods
Most common methods used are open system and password-based authentication.
Open systems are like public Wi-Fi networks that do not require any passwords. Another one is shared key authentication where both the user and access point (router) verify each other identities via sharing the keys. Just like you enter the SSID (Wi-Fi network name) and password to access on your PC or mobile phone to connect to Wi-Fi network.
In pre-shared key, WEP, WPA, WPA2 and now WPA3 authentication method are used. WEP uses weak security that uses RC4 encryption method which is vulnerable to attacks. WPA uses much stronger TKIP encryption and WPA2/WPA3 uses more stronger AES encryption than WEP and WPA.
Setting up environment for Wi-Fi penetration testing
Now let’s set up our environment to perform penetration testing of wi-fi networks. For that you need.
- Your own wi-fi network (do not use other people wi-fi network for penetration testing since this is illegal without their consent)
- Kali Linux
- Wi-fi device supports monitoring mode.
It is recommended to use Oracle VM Virtual Box for creating kali virtual machine in your laptop because it support USB bypass to allow external wi-fi devices.
Setting up Wi-fi adapter
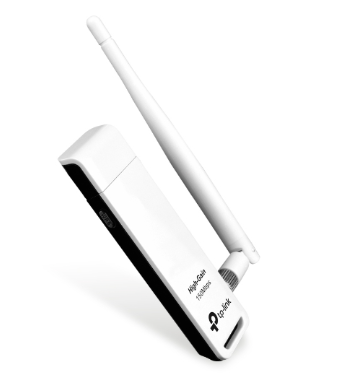
Here I will be using the TP link TL-WN722N version 2 USB Wi-Fi adapter for testing that supports monitor mode. Refer to section 4 of this blog to check whether your Wi-Fi adapter supports monitoring mode.
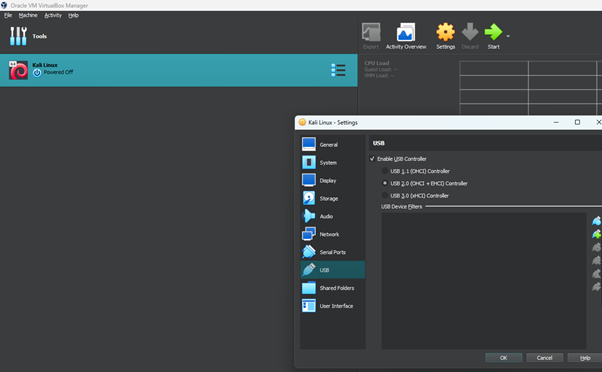
Once you plug in the Wi-Fi USB then go to your virtual box settings and navigate to USB tab. Select the “Enable USB Controller and select the USB 2.0 option. Once done click “OK” to save the settings.
Fire up your kali VM and type 'lsusb' in your terminal. As you can see the TP link usb is not available.

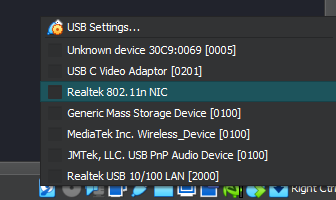
You will see some icons at the bottom right corner of your kali VM, right click the usb icon and select your wi-fi adapter. Here my TP Link USB Wi-Fi adapter is Realtek 802.11n NIC.
Once selected, run the ‘lsusb’ command again and you see your Wi-Fi adapter in the list.

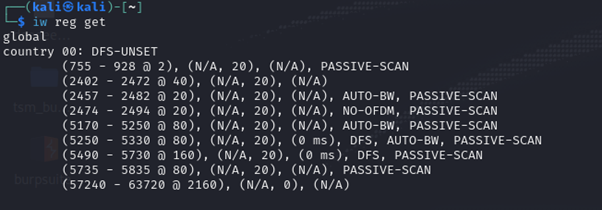
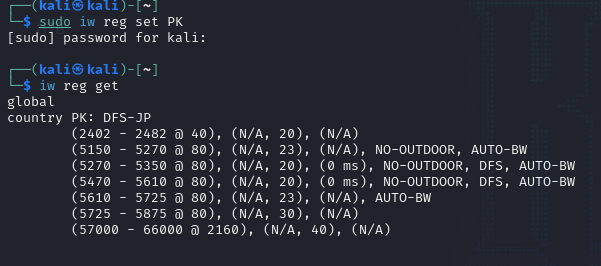
Once connected, we need to make sure you set your country of residence to comply with your local regulations with respect to using wireless frequencies. Let’s first check what country is set. Run the command ‘iw reg get’. I can see that in my case, no country is set and therefore I would need to use the two digits of my country code.
Run the command ‘iw reg set PK’ where PK represents Pakistan. Then run the command ‘iw reg get’ to check whether the country code is applied.
Determining and enabling monitor mode in Wi-Fi adapter
Monitor mode is important for penetration testers to capture Wi-Fi traffic for further analysis to find and exploit vulnerabilities due to any misconfigurations, weak security settings in access points (Wi-Fi routers) etc.
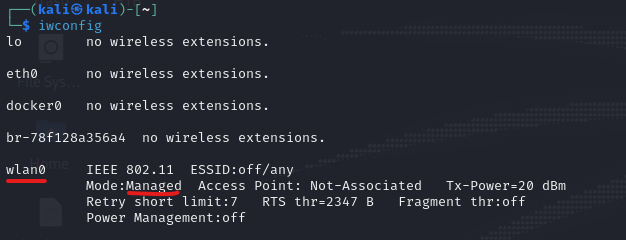
Some Wi-Fi adapters like my TP Link WN-722N version 2 do not come with monitoring mode enabled by default and some adapters do not even support monitoring mode. Use the command ‘iwconfig’ to check whether the monitor mode is enabled. In my case, my TP link is wlan0 with ‘Managed’ mode. This managed mode comes default for normally connecting to access points and sending/receiving the data.
Now there are ways to change the mode to ‘Monitor’ say using iwconfig or aircrack-ng tool. Where I will be using the aircrack-ng tool to change the mode and run some tests.
Aircrack-ng is a great tool with many options like changing modes, capturing Wi-Fi traffic, decrypt captured files and crack pre-shared keys. Let’s look at those options.
For enabling and disabling monitor mode: Airmon-ng
For capturing Wi-Fi traffic: Airodump-ng
For visualizing wireless networks: Airgraph-ng
For generating wireless traffic: Aireplay-ng
For decrypting captured wi-fi traffic files: Airdecap-ng
For cracking pre-shared keys or PMKID: Aircrack-ng
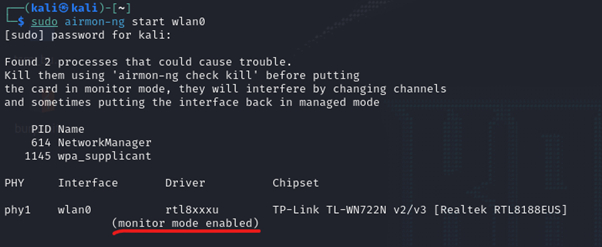
Let’s start airmon-ng option start monitor mode.
sudo airmon-ng start wlan0
where wlan0 is my TP link Wi-fi adapter. You can see from the image that monitor mode is now enabled.
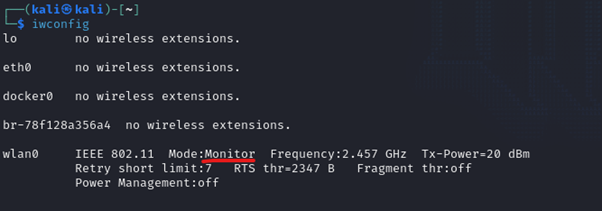
I can verify the same from iwconfig command.
Some interfering processes may cause issues changing mode. In these situations, run the following commands to kill the interfering processes and rerun the above commands
sudo airmon-ng check
sudo airmon-ng check kill
To stop the monitoring mode run the command.
sudo airmon-ng stop wlan0
Basic tests to capture wi-fi traffic
Let’s start capturing wi-fi traffic. run the command ‘sudo airodump wlan0’. From below image, I can see Wi-Fi access points including mine “DeedeeLocal’ and connected clients.
Some important information that I can see is valuable, which channels these access points are using, the encryption and authentication type ESSID and MAC addresses.
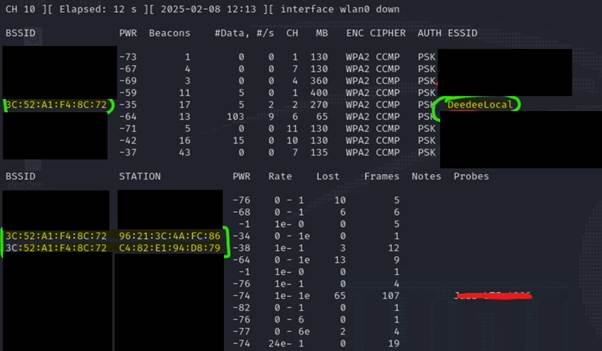
Ctrl + C to break as airmon-ng will continue to capture traffic.
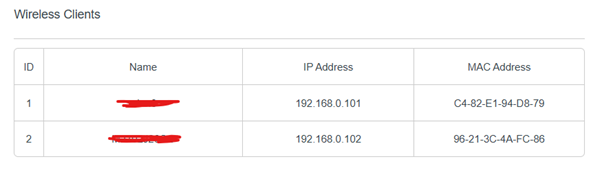
I can verify these two clients are connected to my Wi-Fi access point from my access points web portal.
Congratulations, you have now learned to set up your Wi-Fi penetration testing environment and some basic skills to capture Wi-Fi traffic.

Created on: December 13, 2024
Related Blogs
In this blog, I will teach you the penetration technique to capture and bruteforce Wi-Fi traffic....

December 18, 2024
More than 50% of all cyber-attacks are committed against small and medium-sized...
December 13, 2024